
티스토리 뷰
쿠버네티스로 DevOps 구현 - 3-2. 젠킨스 설치 및 젠킨스 빌드 파이프라인 구축(배포 자동화) gradle build부터 도커 push까지
개발자 하나 2023. 3. 1. 01:13새 프로젝트 등록
젠킨스 메인에서 New Item을 누르고 아이템 이름을 넣어 Pipeline을 선택합니다.

General에서 Github project url 입력
저는 공개 리포지토리라서 https 주소로 입력했지만
비공개라면 등록한 SSH 정보를 이용하기 위해 SSH 주소를 입력합니다.

build trigger에서 깃 푸시 할 때 파이프라인이 실행되도록 설정할 수 있습니다. (플러그인 설치하면 나타남)

해당 설정을 사용하려면
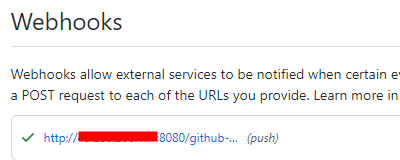
Github에서 리포지토리 > Webhook에 들어가서,
젠킨스 주소 + /github_webhook 주소 등록 및 push에 체크해줍니다.
Github Repository에 배포할 소스가 있어야 하는데,
저는 Spring Boot Initializer로 Java11 + 그래들 + jar 설정된 기본 스프링부트에 시작화면을 만들어 올렸습니다.
Pipeline에서 Pipeline script를 선택합니다.
하단의 Pipeline Syntax를 클릭하면 파이프라인 snippet을 이용할 수 있습니다.
대략적인 파이프라인 구성은 다음과 같습니다.
스테이지별로 실행되고, 대시보드에서 스테이지별로 확인할 수 있습니다.

pipeline {
    agent any

    environment {
        변수key = "value"
    }

    stages {
        stage('스테이지 이름') {
          steps {
            echo 'Clonning Repository'
            git url: 'git@github.com:XXX/jenkinsbuildtest.git',
              branch: 'main',
              credentialsId: 'github'
            }
            post {
             success {
               echo 'Successfully XXX'
             }
           	 failure {
               error 'This pipeline stops here...'
             }
          }
        }
    }
}
제일 하단에 전체 코드가 있습니다.
파이프라인 스크립트 구성할 때, Pipeline Syntax로 들어가면

다음과 같이 인자를 집어넣어서 자동으로 스크립트를 생성할 수 있습니다.(credential 등 스크립트에 문제가 있으면 알려줍니다)

1. Git clone 스테이지
깃 주소, 브랜치(현재 main), 젠킨스 credential에 등록한 private key가 있는 credential ID를 입력합니다(임의 등록한 id)
stage('Prepare') {
          steps {
            echo 'Clonning Repository'
            git url: 'git@github.com:choisaelim/jenkinsbuildtest.git',
              branch: 'main',
              credentialsId: 'github'
            }
            post {
             success {
               echo 'Successfully Cloned Repository'
             }
           	 failure {
               error 'This pipeline stops here...'
             }
          }
        }
★ clone github 스테이지 실행시 다음 오류가 난 경우
No ECDSA host key is known for github.com and you have requested strict checking. Host key verification failed.
jenkins 내에 접속해서
docker exec -it jenkins-blueocean /bin/bash
git ls-remote -h [깃 repo SSH 주소] HEAD
git ls-remote -h [깃 repo SSH 주소] HEAD 실행, known_host에 등록시킵니다.
젠킨스 내에서 github SSH 주소가 인증되지 않아서 나는 문제입니다.
ex) git ls-remote -h git@github.com:choisaelim/jenkinsbuildtest.git HEAD
혹은 젠킨스 설정에서 Configure Global Security > Git Host key Verification Configuration을 Accept first connection으로 바꾸면 해당 오류가 나지 않습니다. (젠킨스 문서 참조)
https://plugins.jenkins.io/git-client/#plugin-content-ssh-host-key-verification

★ status code 128 오류가 난 경우
ERROR: Error cloning remote repo 'origin' hudson.plugins.git.GitException: Command "git fetch --tags --force --progress -- git@github.com:choisaelim/jenkinsbuildtest.git +refs/heads/*:refs/remotes/origin/*" returned status code 128: stdout: stderr: Host key verification failed. fatal: Could not read from remote repository. Please make sure you have the correct access rights and the repository exists.
github 공개키 / jenkins 비밀키 / 파이프라인에 입력한 credentialId / github 주소 넷 중 무언가가 잘못된 것이므로 확인해봐야 합니다.
github 주소에 SSH 주소를 입력했다면 공개 repository라도 credential이 꼭 있어야 합니다. (https주소는 상관없음)
2. gradle build 스테이지
gradlew를 이용해, 파이프라인 실행시 스프링 프로젝트 내 설정에 따라 그래들이 설치되고 해당 gradle로 빌드할 수 있게 합니다. 저는 현재 git repo에 demo 폴더 내에 소스가 있어서 dir(demo){ } 내에서 /.gradlew로 실행하였습니다.

        stage('Bulid Gradle') {
          steps {
            echo 'Bulid Gradle'
            dir('demo'){
                sh './gradlew --no-daemon clean build'
            }
          }
          post {
            failure {
              error 'This pipeline stops here...'
            }
          }
        }
★ gradlew 파일 경로가 맞지 않으면 아래와 같은 오류가 표시됩니다. dir 등으로 경로를 맞춰줍니다.
FAILURE: Build failed with an exception. * What went wrong: Directory '/home/jenkins/agent/workspace/aaa' does not contain a Gradle build. A Gradle build should contain a 'settings.gradle' or 'settings.gradle.kts' file in its root directory. It may also contain a 'build.gradle' or 'build.gradle.kts' file. To create a new Gradle build in this directory run 'gradle init' For more detail on the 'init' task see https://docs.gradle.org/7.6/userguide/build_init_plugin.html For more detail on creating a Gradle build see https://docs.gradle.org/7.6/userguide/tutorial_using_tasks.html
★ 권한이 부족하면 다음 오류가 표시됩니다.
[Gradle] - Launching build.
[aaa] $ /home/jenkins/agent/workspace/aaa/demo/gradlew clean build
FATAL: command execution failed
java.io.IOException: Cannot run program "/home/jenkins/agent/workspace/aaa/demo/gradlew" (in directory "/home/jenkins/agent/workspace/aaa"): error=13, Permission denied
git bash로 확인하고 git repo의 gradlew 권한을 변경해줍니다.
vs코드의 경우 터미널에서 git bash로 들어갈 수 있습니다.

git ls-tree HEAD
git update-index --add --chmod=+x gradlew
★ 메모리가 부족하면 다음 오류가 표시됩니다.
command terminated with exit code 137
EC2 용량 늘리기 - 해결 안됨
쿠버네티스에서 돌렸을 때 해당 오류가 떴고 EC2에선 안 떴던것 같은데,
swap 명령어로 스토리지 용량을 메모리로 쓸 수 있도록 설정 가능합니다.
sudo fallocate -l 2G /swapfile
sudo chmod 600 /swapfile
sudo mkswap /swapfile
sudo swapon /swapfile
★ gradle daemon 종료되는 경우
Gradle build daemon disappeared unexpectedly (it may have been killed or may have crashed)
--no-daemon 옵션을 붙입니다.
./gradlew --no-daemon clean build
★ 기타 젠킨스에서 gradlew 실행시 오류
gradlew에 -scan --stacktrace --debug 등 인자를 붙여서 로그 확인
3. docker build 스테이지
        stage('Bulid Docker') {
          steps {
            echo 'Bulid Docker'
            dir('demo'){
                script {
                    dockerImage = docker.build("${imagename}:${currentBuild.number}")
                }
            }
          }
          post {
            failure {
              error 'This pipeline stops here...'
            }
          }
        }
docker.build() 내에는 tag(이미지 이름:태그, 태그 없으면 latest로 불러옴)인자를 써도 되고, 없어도 build(imagename)으로 빌드 가능합니다. file로 도커파일 위치를 지정 가능합니다. (도커 빌드 인자는 https://docs.docker.com/engine/reference/commandline/build/ 참고)
currentBuild.number는 글로벌 변수로 현재 빌드 넘버를 자동으로 불러옵니다.
docker.build(imagename) 는 docker build -t imagename . 과 같습니다.
단, 경로에 Dockerfile이 있어야 합니다.
'docker exec -it jenkins-blueocean /bin/bash' 으로 jenkins 내에 접속해서 pipeline 경로에 Dockerfile을 직접 만들어도 됩니다. (현재 경로 이름 : /var/jenkins_home/workspace/아이템 이름/깃폴더이름)
Dockerfile 내용
openjdk install, 그래들로 빌드된 파일 경로를 JAR_FILE_PATH에 저장
빌드된 jar 파일을 도커 컨테이너 내 app.jar로 복사,
3030 tcp 포트 오픈, 도커 파일 실행시 java -jar app.jar 을 실행합니다.
FROM adoptopenjdk/openjdk11
ARG JAR_FILE_PATH=/build/libs/demo-0.0.1-SNAPSHOT.jar
COPY ${JAR_FILE_PATH} /app.jar
EXPOSE 3030/tcp
ENTRYPOINT ["java", "-jar", "app.jar"]
★ Dockerfile 이름이 틀린 경우
ERROR: invalid tag "./DockerFile": invalid reference format
Dockerfile에서 대소문자 등 틀린 경우 해당 오류가 납니다.
★ docker run으로 생성된 도커 이미지 실행시 다음 에러 나는 경우
Error: Invalid or corrupt jarfile /app.jar

COPY app.jar이 제대로 실행되지 않음
아래는 제대로 COPY 됐을 때 로그입니다.(복사 대상이 나와 있음)
ARG JAR_FILE_PATH= /build/libs/demo-0.0.1-SNAPSHOT.jar 같이 변수 지정에 공백이 있거나 파일 이름이 잘못된 도커 이미지로 인해 생긴 오류입니다.

3. docker push 스테이지
github처럼 젠킨스 Global credential에 들어가서 도커 허브 계정 정보를 입력합니다.

registryCredential에 여기서 적은 ID를 입력합니다.
파이프라인이 실행되면 도커 허브에 만들어진 도커 이미지가 push됩니다.
        stage('Push Docker') {
          steps {
            echo 'Push Docker'
            script {
                docker.withRegistry( '', registryCredential) {
                    dockerImage.push()
                }
            }
          }
          post {
            failure {
              error 'This pipeline stops here...'
            }
          }
        }
★ Docker 권한 오류 나는 경우
Got permission denied while trying to connect to the Docker daemon socket
sudo groupadd docker
sudo usermod -aG docker $USER #해당되는 유저에 도커 그룹 권한 부여
newgrp docker
https://codin9.tistory.com/9 참조
다음 단계는 ArgoCD 설치 및 젠킨스 파이프라인과 연동입니다.
하단은 전체 코드입니다.
pipeline {
    agent any

    environment {
        imagename = "alger426/spring"
        registryCredential = 'docker-hub'
        dockerImage = ''
        K8S_DEPLOYMENT_NAME = 'test-webapp-1'
        POD_NAMESPACE = 'default'
    }

    stages {
        stage('Prepare') {
          steps {
            echo 'Clonning Repository'
            git url: 'git@github.com:choisaelim/jenkinsbuildtest.git',
              branch: 'main',
              credentialsId: 'github'
            }
            post {
             success {
               echo 'Successfully Cloned Repository'
             }
           	 failure {
               error 'This pipeline stops here...'
             }
          }
        }

        stage('Bulid Gradle') {
          steps {
            echo 'Bulid Gradle'
            dir('demo'){
                sh './gradlew --no-daemon clean build'
            }
          }
          post {
            failure {
              error 'This pipeline stops here...'
            }
          }
        }

        stage('Bulid Docker') {
          steps {
            echo 'Bulid Docker'
            dir('demo'){
                script {
                    dockerImage = docker.build("${imagename}:${currentBuild.number}")
                }
            }
          }
          post {
            failure {
              error 'This pipeline stops here...'
            }
          }
        }

        stage('Push Docker') {
          steps {
            echo 'Push Docker'
            script {
                docker.withRegistry( '', registryCredential) {
                    dockerImage.push()
                }
            }
          }
          post {
            failure {
              error 'This pipeline stops here...'
            }
          }
        }

        stage('K8S Manifest Update') {
            steps {
                git branch: 'main', credentialsId: 'k8smanifestgit', url: 'git@github.com:choisaelim/k8smanifest.git'
                sh "sed -i 's/spring:.*\$/spring:${currentBuild.number}/g' deployment.yaml"
                sh "git add deployment.yaml"
                sh "git commit -m '[UPDATE] spring ${currentBuild.number} image versioning'"
                sshagent(credentials: ['k8smanifestgit']) {
                    sh "git remote set-url origin git@github.com:choisaelim/k8smanifest.git"
                    sh "git push -u origin main"
                }
            }
            post {
                failure {
                  echo 'K8S Manifest Update failure !'
                }
                success {
                  echo 'K8S Manifest Update success !'
                }
            }
        }

    }

}
'쿠버네티스,AWS,JPA,CICD,MSA사이드프로젝트' 카테고리의 다른 글
| 쿠버네티스로 DevOps 구현 - 3-4. 젠킨스 파이프라인과 ArgoCD 연동 (0) | 2023.03.01 |
|---|---|
| 쿠버네티스로 DevOps 구현 - 3-3. ArgoCD 설치 및 Github SSH 연결, 쿠버네티스 배포 설정 (0) | 2023.03.01 |
| 쿠버네티스로 DevOps 구현 - 3-1. 젠킨스 설치 및 젠킨스 빌드 파이프라인 구축(배포 자동화) 젠킨스 환경 구축하기 (0) | 2023.02.28 |
| AWS 클라우드 EC2 서버 탄력적 IP 설정 및 해제 (0) | 2023.02.28 |
| 쿠버네티스로 DevOps 구현 - 2. AWS 환경에서 kops로 쿠버네티스 클러스터 생성 (0) | 2023.02.10 |